
Friday, August 7, 2015
Tuesday, August 20, 2013
HIM in Them
This week is Student Portrait Week on the NOT Back-to-School Blog Hop. I never know what to do for this week, as I'm not really comfortable posting photos of my kids in public places online. Besides, summer is soooo not the time to get nice portraits of anybody down here. I usually take those in the winter when the grass is green and the temperatures are below the sweating threshold.
With my oldest I see God's sense of creative order. The building blocks of the universe (i.e. atoms) are so orderly, dependable, follow recognizable patterns and laws, even though it is all unbelievably complex (one science book I read suggested that you could study math for 4 years after Calculus in order to be able to understand it pretty well). My 11th grader is like this. Order. Precision. Complex, but with pattern.
In my 9th grader I see the Lord's servant heart. She jumps in to help in meek and quiet ways without being asked. She is trusted with the same duties and responsibilities as teens 4 years older than her, because she is so capable and reliable. Children that are problems for some of our church's adults respond to her and are well behaved when she is asked to sit next to them. I try to protect her, however, because her capabilities combined with her height (5'10") makes people forget that she is only 14. I worry that an inappropriate amount of responsibility might be thrown on her before she is truly ready. I foresee her being a linchpin (as Seth Godin defines it) in her church, quietly indispensable (very much like her grandmother, my mother-in-law, by the way).
My 5th grader has such a tender heart, both taking correction so quickly to heart himself, but also seeing hurt and needs in others around him. At only 10, he is more likely to see others' need for prayer than his older siblings. And he has God's hear too. His track record for quickly and impressively answered prayer and literal dreams come true is amazing. He prays for rain and it rains (which is more impressive down here than in say Seattle). Last week we received some sad news about a couple people in our church and we all prayed that it would be quickly resolved. However, in addition to praying, my son reported dreaming about the resolution and two days later we got news that it happened almost as he dreamed it. He dreamed that they showed up in a specific person's truck, but what happened is that they called that person to come get them with that truck. I honestly don't know what to make of this. Coincidence? Maybe, but things like that have happened to him before, although not quite this awe inspiring.
My 3rd grader is generous to a fault, giving beyond what is reasonable or deserved. Once my nephew-in-law was teasing him, asking for all the best candy from his piñata bag, and my son kept giving to him, happily. I could see that my nephew-in-law was just teasing, that he would keep asking until he got my son to say no, but I had to tell him that my son would give half his candy away before he said no. I totally see the Lord in this quality, giving unto us showers of blessings beyond what we have ever deserved.
My 1st grader is friendly and comforting to others, seeking out other children that are quiet or shy and pulling gently them out. She shares everything readily, without being asked. People of all ages are drawn to her. This friendly, welcoming spirit about her seems very Christ-like to me.
So, do you see Him in your children? It's so easy as parents that want the best for our children to always focus on the areas that need improvement. It was a blessing to me today to focus on at least one thing that each is doing that is godly and praise worthy.
Anyway, I read an interesting question this morning that got me thinking about my kids. It was, "How do you see the image of God in your kids?" If they are created in His image, as I believe we all are, then I should see some reflection of Him in them. And you know what? When I got thinking about it I could see some of Him in each of them.
So, instead of photographs of my five children, here are verbal snapshots of how each of them show God's image in their lives.

With my oldest I see God's sense of creative order. The building blocks of the universe (i.e. atoms) are so orderly, dependable, follow recognizable patterns and laws, even though it is all unbelievably complex (one science book I read suggested that you could study math for 4 years after Calculus in order to be able to understand it pretty well). My 11th grader is like this. Order. Precision. Complex, but with pattern.
In my 9th grader I see the Lord's servant heart. She jumps in to help in meek and quiet ways without being asked. She is trusted with the same duties and responsibilities as teens 4 years older than her, because she is so capable and reliable. Children that are problems for some of our church's adults respond to her and are well behaved when she is asked to sit next to them. I try to protect her, however, because her capabilities combined with her height (5'10") makes people forget that she is only 14. I worry that an inappropriate amount of responsibility might be thrown on her before she is truly ready. I foresee her being a linchpin (as Seth Godin defines it) in her church, quietly indispensable (very much like her grandmother, my mother-in-law, by the way).
My 5th grader has such a tender heart, both taking correction so quickly to heart himself, but also seeing hurt and needs in others around him. At only 10, he is more likely to see others' need for prayer than his older siblings. And he has God's hear too. His track record for quickly and impressively answered prayer and literal dreams come true is amazing. He prays for rain and it rains (which is more impressive down here than in say Seattle). Last week we received some sad news about a couple people in our church and we all prayed that it would be quickly resolved. However, in addition to praying, my son reported dreaming about the resolution and two days later we got news that it happened almost as he dreamed it. He dreamed that they showed up in a specific person's truck, but what happened is that they called that person to come get them with that truck. I honestly don't know what to make of this. Coincidence? Maybe, but things like that have happened to him before, although not quite this awe inspiring.
My 3rd grader is generous to a fault, giving beyond what is reasonable or deserved. Once my nephew-in-law was teasing him, asking for all the best candy from his piñata bag, and my son kept giving to him, happily. I could see that my nephew-in-law was just teasing, that he would keep asking until he got my son to say no, but I had to tell him that my son would give half his candy away before he said no. I totally see the Lord in this quality, giving unto us showers of blessings beyond what we have ever deserved.
My 1st grader is friendly and comforting to others, seeking out other children that are quiet or shy and pulling gently them out. She shares everything readily, without being asked. People of all ages are drawn to her. This friendly, welcoming spirit about her seems very Christ-like to me.
So, do you see Him in your children? It's so easy as parents that want the best for our children to always focus on the areas that need improvement. It was a blessing to me today to focus on at least one thing that each is doing that is godly and praise worthy.
Monday, August 19, 2013
Pretty Clipboards (with tutorial)

I recycled 10 ink cartridges at Staples last month and received a $20 rewards coupon this month for the effort. I needed Post-It Flags (i.e. bookmarks) and my freshman daughter wanted a new binder to hold her music, so off we went to Staples Saturday.
After the binder and Post-It Flags (and hitting the 1¢ sales for pocket tissue packs and spiral notebooks), I still had a lot of money left on the rewards coupon and I remember that I had considered getting a clipboard for each of the kids. I had tried it once before, getting them each one in their color. They liked having their own clipboards and used them a lot, but they were cheap plastic ones that broke in very short order. I knew the ugly brown Staples clipboards last forever (I have one that we've shared for over a decade), and at minimum I figured I could put a piece of colored duct tape on the back to signify who they belonged to.
So I got 4 of the ugly brown clipboards (my junior didn't want one) and had a flash of insight. Scrapbook paper! Mod Podge! Yes!
So after Staples we stopped by Michael's and I allowed everyone to choose what scrapbook paper they wanted, as long as it was the thinner kind, not the cardstock weight. The paper, and a sponge brush applicator for the Mod Podge, cost just over $6. I got the clipboards with the rewards coupon and had all the other supplies on hand (in my recently made neat and organized craft drawer), so the total for this project was that $6, or $1.50 per clipboard. Not bad at all for custom, pretty, functional school supplies.
Here's how I did it (aka the tutorial part). As always, click on a photo to see it larger.

- clipboards
- normal weight scrapbook paper
- craft paint
- paint palette
- paint brushes
- Mod Podge (not shown)
- sponge applicator thingy (also not shown)
- brayer (not shown)
- fine grit sandpaper, 400 grit (not shown)
- smartphone and earbuds (for tunes ;)


The next step I didn't get a photo of (sorry). I used the 400 grit sandpaper to smooth out the edges of the trimmed paper on both sides. The X-acto knife didn't cut perfectly smooth in all spots, plus sanding a bit took back the paper to smooth with the board, hopefully minimizing the likelihood that it will get caught on something and pull up or tear later.
I did not apply a top coat of Mod Podge, even though the instructions I linked to above said I should apply at least two of them. More than pretty, I need these boards to be functional and I do not like the feel or texture of top coats of Mod Podge and I did not think it would be a good surface to write on.
I am sooooo pleased with the result. They are pretty (or cute since the boys would object to theirs being called "pretty") and work wonderfully too.


Update: July 2014
The kids use their clipboards very regularly, especially the girls, and after a year of use they are still in great condition and still look pretty.
New update: Feb 2016
These clipboards are STILL beautiful and they get used all the time. The pink camo and butterflies are especially hard used, and the scrapbook paper isn't coming up at all. Two and a half years later and I'm still pleased as punch with theses.
Friday, August 16, 2013
My Craft Drawer
Earlier this week I posted photos of my very messy craft drawer, so my pride requires that I show what the drawer looks like after I spent the week (in spare moments) organizing it.
I love art and craft supplies, and I invest in some really nice ones too. But after a year of use, the drawer ended up looking like the upper photo and nothing could be found. If you can't find it, you can't use it. Then last month a friend whose only child is now a teen gave me a big box over flowing with more craft supplies, really cool ones too like air-dry ceramic clay powder. It was past time for a craft drawer extreme make-over.
By the way, how do you like my "ode to the pantry" organization system? ;D
Since I was going through the trouble of organizing the whole drawer, I took the bit of extra time to write down everything I have as well. That drawer looks full enough, but look at this list.
 |
| Messy Drawer |
 |
| Neat Drawer |
By the way, how do you like my "ode to the pantry" organization system? ;D
Since I was going through the trouble of organizing the whole drawer, I took the bit of extra time to write down everything I have as well. That drawer looks full enough, but look at this list.
adhesivesglue sticksModge Podgerepositionable glue stickswhite gluebeads, pony multiple colorsbead craft kit, triceratops (x1)beads, wooden bag multiple sizes and colorsbrads, mini multicolored 100 ct (x2)brayercardboard, stiff 4 pieces 12x9 in & 3 pieces 7 in squareCDs (x12)ceramic plaster clay, add water (x2 buckets)chalk pastels (few loose pieces)container, flat w/ flip lidcork, thin with adhesive backingcrayonsDraw Today drawing curriculum, w/ extra suppliesEaster felt craft kit (x3)feathers, few in bright colorsfixative, sprayglassy jar, 8 oz w/ lidglitter:tube mix red & black sliverstube purpleglitter glue, goldglycerin soaphole punches:3 holecatcircle, minicircle, standardflowerfrogink, for block printing, black (tube and tub)lacing, black ~1.5 yardsmarkers, numerous colors, both washable and notmodeling clay (5 colors)mosaic, paper, jewel tonesNativity felt craft kit (x1, Belle's half finished project)oil pastels (25ct & 50ct)paint:3D "fabric writer" black paint (x3)craft paint, numerous colorspowdered paint (red, blue, & yellow)water based crayola paint (10 ct)water colors, liquid (red, yellow, blue, green, purple, & black)paint brushes, numerous sizespaint palettespanty hose, grey (x2)pipe cleaners, black and metallic greenSculpley clay, small amount neutral colorssequins, bag of blue smallsequins, mix bag of mixed sliver rounds & gold starssequins, bag of large multicolored flowerssequins, bag of large multicolored snowflakesSharpies, many colors, both fine and ultra finestamp:flowerstarstamp pad, purplestamp pad refill ink (red & black)tacks, flat multicoloredwater color crayons (12ct)
wire, thin silver
I think we need to get crafting!
Sunday, August 11, 2013
School Room Week
It's School Room Week over on the NOT Back-to-School Blog Hop. My school room hasn't changed much (at all?) since I posted about it for last year's blog hop. My long dreamt of seventeen foot wall of built-in cabinets and shelves is still there, still beautiful, and still holding 14 years of homeschool stuff (preschool through 11th grade). My husband is awesomesauce and put in these beautiful built-ins a year ago last month. However, I don't have a wide angle lens and I can't get a photo of the entire wall in one shot. So here's two of them.
 These fill up the western wall in our family room and in addition to serving as our school room it is also our dining room, toy room, computer room, entertaining room, and is open to our kitchen and living room.
Even though our school room hasn't changed since last year, these things do have to organized at least yearly. I had planned to get all the organizing and cleaning out done in time for School Week on the NOT Back-to-School Blog Hop, but so is life. So, instead, I took the opportunity (let's call it that ;) and am showing you "real life" photos. This is more or less what my school room looks like every Sunday afternoon. We live in that room, and it shows.
I have gotten the upper cabinets all organized. Here's the inside of two of them.
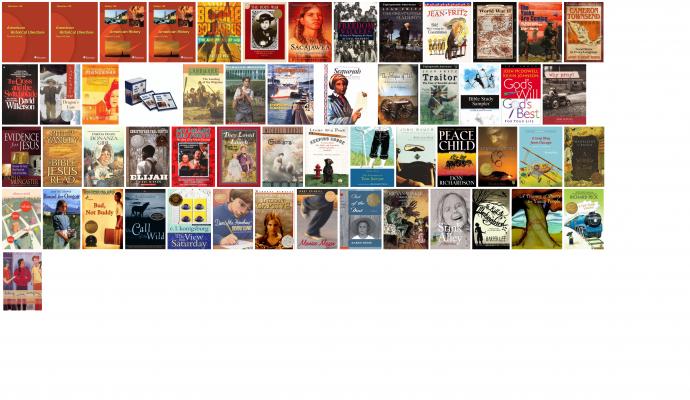
 Jim Trelease, author of The Read-Aloud Handbook, started the rain gutter book shelves idea. The premise is that if kids can see the cover of the books they will be more likely to pick the book up to read it. The idea makes sense, but I simply do not have the wall space to pull it off. This is my compromise, and it works. Less than an hour after I set these up, my son picked up that Greg's Microscope book and started reading it. He has had access to that book for over a year, but this the first time he took it off the shelf. Note my microscope on the upper right shelf. It makes me smile every time I see it.
You can't see them, but the center lower cabinets is a drawer unit. It's three drawers, the top standard depth, the bottom two 8 inches deep. They are full to overflowing with arts and crafts supplies. The bottom one is all paper, drawing paper, scrapbook paper, printer paper (white and colored), construction paper, and much, much more. The one above it numerous kinds of paints, markers, crayons, glues, beads, art kits, and more that I probably can't remember because the drawer is such a mess. Plus a friend whose only child is now a teen gave me a box of even more supplies a few weeks back. Going through these drawers is high on my list for this month.

Lastly I want to show that basket in the middle of the second shelf from the top. It contains an idea I got from last year's School Room week. It's a nature basket. I want to get a flat tray so that the things will be able to be seen while it's on that shelf, but I haven't found one I like yet that isn't $$$.
 In the basket is honey comb, a butterfly wing glued to cardstock, a burro vertebra, a coyote atlas bone, lots of sea shells, a piece of sand stone, a piece of petrified wood, a devil's claw, and a few other things. Not bad for only a year's worth of collection, huh? It's been very educational too, as we research each find. It took hours of googling and reading (not all at once) to figure out the smaller bone on the left was a coyote atlas bone. You can't buy curriculum that teaches skills like that.
Update: I organized that terrible craft drawer. See here.

Even though our school room hasn't changed since last year, these things do have to organized at least yearly. I had planned to get all the organizing and cleaning out done in time for School Week on the NOT Back-to-School Blog Hop, but so is life. So, instead, I took the opportunity (let's call it that ;) and am showing you "real life" photos. This is more or less what my school room looks like every Sunday afternoon. We live in that room, and it shows.
I have gotten the upper cabinets all organized. Here's the inside of two of them.

You can't see them, but the center lower cabinets is a drawer unit. It's three drawers, the top standard depth, the bottom two 8 inches deep. They are full to overflowing with arts and crafts supplies. The bottom one is all paper, drawing paper, scrapbook paper, printer paper (white and colored), construction paper, and much, much more. The one above it numerous kinds of paints, markers, crayons, glues, beads, art kits, and more that I probably can't remember because the drawer is such a mess. Plus a friend whose only child is now a teen gave me a box of even more supplies a few weeks back. Going through these drawers is high on my list for this month.

Lastly I want to show that basket in the middle of the second shelf from the top. It contains an idea I got from last year's School Room week. It's a nature basket. I want to get a flat tray so that the things will be able to be seen while it's on that shelf, but I haven't found one I like yet that isn't $$$.
 In the basket is honey comb, a butterfly wing glued to cardstock, a burro vertebra, a coyote atlas bone, lots of sea shells, a piece of sand stone, a piece of petrified wood, a devil's claw, and a few other things. Not bad for only a year's worth of collection, huh? It's been very educational too, as we research each find. It took hours of googling and reading (not all at once) to figure out the smaller bone on the left was a coyote atlas bone. You can't buy curriculum that teaches skills like that.
Update: I organized that terrible craft drawer. See here.
Monday, August 5, 2013
Curriculum Week
 ACK! August is upon me like a dust storm: fast, unexpected, and bringing all kinds of work with it. The 5th Annual "NOT" Back to School Blog Hop is in full swing already, and I haven't even gotten my first (and favorite) post written.
It's Curriculum Week at the blog hop, and as always I have a long old post to share. I'm an eclectic homeschooler with five kids, so really there is no adequate way to tell what we're using for curriculum in a short post.
1st grader - I suspect this little bundle of pink energy might just be ADHD. She can't focus if she isn't moving, she has the attention span of a gnat, and she talks excessively. Thankfully, we homeschool, so she can do math on the floor, listen to history while folding towels, and practice reading between running back and forth between Daddy-Boy (her name for my husband) and me.
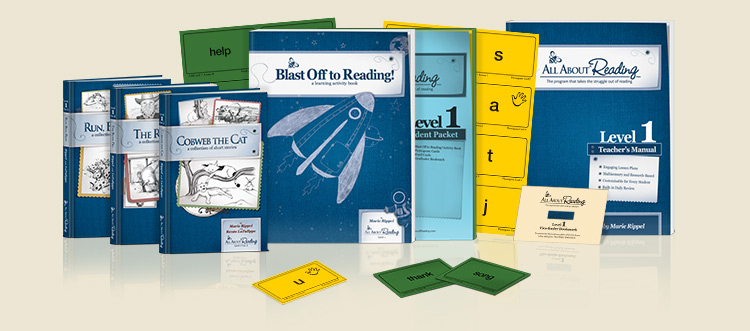
- All About Reading Level 1. She's been working on this since April or so, and is still only on lesson 9 out of 49. I am thankful this program is designed to go at the child's pace, because having to slow something down this much if it wasn't designed this way would be hard.
- Miquon Math Orange. Followed by Red when she finishes Orange. She will be the last of all of my kids to do Miquon. It lays the foundation for mathematical thinking and understanding that follows them into high school math and beyond. Couple that with the fact that it's inexpensive and easy to use, and I can't stop singing Miquon's praises.
- Renaissance through early 20th Century with Sonlight Core C, for the first semester (or less, if we can get through it faster), then moving into American History with Sonlight Core D. I considering her "tagging along" in these Cores, as she is below the age range Sonlight recommends them for. However, she is getting a fair amount out of Core C and with everything else we have going on having her tag along with her brothers is better than having her own Core that we never get around to doing.
- Apologia Astronomy with A Journey Through Learning Lapbook. Her brothers and she share this lapbook, each doing mini-books at their individual level to create one lapbook total. We're more than half way through this and will move into Sonlight Science C after.
- Egermeier's Story Bible with memory verses from Sunday School and Wednesday Bible Club. We're almost finished with Egermeier's and will move into Leading Little Ones to God.
3rd grader - This guy is a math wiz, but has more struggles with reading. His comprehension is great, and he has no fears about attempting harder books, so I'm confident that he'll be tearing through harder and harder chapter books this year.
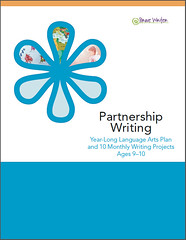
- Partnership Writing, from Brave Writer, with copywork and Activity Sheets from Sonlight Grade 2 Language Arts. (Look for an upcoming review of Partnership Writing).
- All About Reading Level 2. He is nearing the end of this and will be moving into Sonlight Grade 3 Readers. I hope he is ready for the Core D Regular Readers by the time we start Core D.
- All About Spelling 2, then 3. He'll start this when he finishes AAR 2.
- Singapore 3A, then 3B. He finished Miquon a year early, at the end of 2nd grade, and is now tearing through Singapore 3A. I definitely foresee calculus in this kid's future.

- Journible Psalm 119. In this he'll be copying out the entire 119th Psalm by hand, a verse a day. He'll also be listening to Egermeier's Story Bible, then moving into Leading Little Ones to God, as above.
- Sonlight Core C, then D, as explained above.
- Apologia Astronomy with A Journey Through Learning Lapbook, then Sonlight Science C, as explained above.
5th grader - This middle child is dyslexic, and works hard to be just on grade level in all areas.
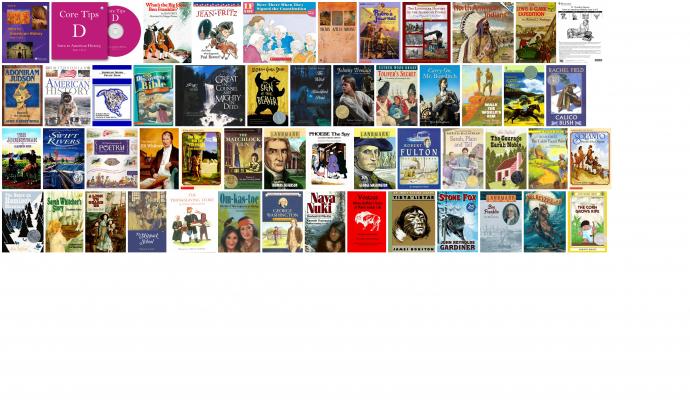
- Sonlight Core D, after we finish Sonlight Core C. I updated my 2007 Core D to match the 2013 version, because I love the new Landmark book and the Children's Encyclopedia of American History. However, I only got the 4-day option as I don't like the 5th-day History books and wasn't excited about the 5th-day Read Alouds either. I will add in a few of the 2007 books that were removed to make my own 5-day version. The titles I'll be adding back in are: Paddle-to-the-Sea, Sign of the Beaver, maybe Secret of the Andes, and Winter at Valley Forge (this one is a 5-day book in the new IG).
- Partnership Writing, from Brave Writer, with copywork and Activity Sheets from Sonlight Grade 4-5 Language Arts. He'll move into Core D's LA (included in the Core D Instructor's Guide) when we get there.
- Sonlight Grade 4-5 Readers, moving into Core D's Advanced Readers.
- Singapore 3B, moving into 4A and Challenging Word Problems 3. I know I said he was on grade level in everything, and doing Singapore 3B in 5th grade seems to contradict that. However, I spent some time looking at other math options at the Phoenix homeschool convention, and he would be ready to go into 5th grade math in a couple of other programs, so I am confident that Singapore 3B is grade level for a 5th grader, especially one with learning difficulties.
- All About Spelling 4. He'll move into All About Spelling 5 about mid-year or so. All About Spelling 7 is high school level spelling, so level 4 is quite appropriate for 5th grade.
- Science and Bible the same as his brother and sister above.
9th grader - My newest high schooler.
- Sonlight Core 100. This will count as 1 credit in American History and 1 credit in American Literature English (we're only using one of the Core 100 Bible books). I'm using the 2012 version of this Core, which has a few books different but is generally much the same as the current version.
- Journibles Book of Romans, The Case for Christ, Why Pray?, and Pilgrim's Progress (in the original English).
- Life of Fred Beginning Algebra. She's going to try Life of Fred out for Algebra I, since I already own it. We can go a different route if she has too many difficulties with it.

- Apologia Biology. We are doing this as as a teeny co-op with two or three other families, getting together for the labs. It won't start until Sept.
- All About Spelling 7. She's more than half way through this book, then she'll be finished with All About Spelling and will move into Winston Grammar Advanced.
- Rosetta Stone Latin American Spanish, Level 1 moving into Level 2.
- Drawing on the Right Side of the Brain. I'm working through this with her.
- Guitar and Choir, we're tracking hours in these for high school credit.
11th grader - Can I just spare a moment to stand in shock that my baby is /this/ close to being an adult? Anyway, this kid is bright to somewhat advanced in all areas and really wants to attend Embry-Riddle Aeronautical University (ERAU) in Prescott for a degree in Aerospace Engineering. While legally we are still homeschooling this kid, we are outsourcing a lot of this (and probably next) year's school.
- English 101, at the community college. Yep, he only completed Sonlight through Core 100, with Brave Writer's Help for High School thrown in, and yet he tested well above where he needed to to place into English 101. This will be his English credit for his Junior year, plus it will transfer to ERAU as Com 122 "English Composition".
- Strategies
for Success, at the community college. This is an electives
credit, but both my husband and I know that this course will teach skills
that will help him greatly in the long term. From the course description,
"Strategies For Success is course designed for students to develop and enhance their academic and personal skills. Emphasis is placed upon promoting a successful college experience through improved study skills, critical thinking skills, and general life skills. Topics include: self awareness, career exploration, college resources/policies, memory techniques, test-taking strategies, note-taking, time management, goal setting, learning styles, technology, values clarification, community involvement, and effective communication. The course will encourage students to examine their own behaviors, expectations, and attitudes to help them exercise more effective strategies for success."
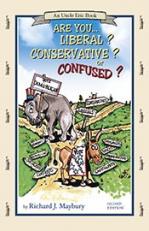
- Constitution class, through our local Freedom Library. There is a $1000 scholarship opportunity attached to taking the class as well. For a full 1/2 credit in Civics, in addition to the class I am having him read the Communist Manifesto; Whatever Happened to Justice?; Are You a Liberal? Conservative? or Confused; and Ancient Rome: How it Affects You Today.
- He is reading the Bible through this year for Bible, as well as reading Do Hard Things and Foxes' Book of Martyrs. I might add one other book as well, but I haven't decided what yet.
- Life of Fred Trigonometry. This is only a semester course (full year trig courses actually add other things to it, as there really isn't that much to trig), so he'll move into Life of Fred Calculus at semester.
- Finishing Rosetta Stone Latin American Spanish, Level 3. Assuming he finishes this fall, and does well on the practice test, I will have him taking the SAT subject test, Spanish with Listening.
- Advanced Welding. Last spring, my son got a personal invitation from the public high school's welding teacher to attend his Advanced Welding classes. This teacher has been Teacher of the Year multiple times, and is known the county over for his outstanding students. The Advanced Welding class is first and second period each day, meaning my son would have to be out the door no later than 7:10 in order to drive himself to the 7:30 class time (he's usually rolling out of bed at 7:15). He still wanted to go, which told me something about his dedication, so we did all the paperwork and standing in line to get him partially enrolled and registered, including having to buy uniforms. Many (most?) kids that come out of two years of this class (junior and senior year) are ready to sit for their welding certificate, and the content corresponds to the community college's welding classes, so for an additional fee (but less than the college classes cost) he'll get 6 credits a year.
- He'll read a play (we haven't decided which one yet) to finish out a 1/2 credit in Drama (he's acted in a couple plays and a few skits since he was a freshman).
- Finishing up How to Listen to and Understand Great Music. That, along with attending a number of local civic orchestra concerts, for a 1/2 credit in Music Appreciation.
Friday, July 19, 2013
4 for 4: Doing, Not Pinning
My summer goal to actually make a pin a week is going great, much better than I anticipated. Because, let's be honest here, I'm kind of flaky and have the attention span of a gnat. Four weeks in a row I have done at least one thing from my pin board. Last week I even did two things!
 This week I finally got around to something that has been on my heart since last fall or before. My family has been suffering from a lack of gratitude for a long time now and I've been wanting to do something about it. So when I ran across this pin for the idea of a gratitude jar (right), I knew it was what I wanted.
 This is what I came up with. I had all kinds of ideas for a gratitude jar. I was going to put a nice quilted strip around the middle of a mason jar, but I'm really not that good at quilting and I could never decide what colors I wanted anyway. Then I was going to get some glass etching paste and etch "Gratitude" down the side of my button jar, but then I would have to find a new button jar. Anyway, the upshot was that months went by and I never got around to doing anything.
Then, with all the pins I've been making lately, I decided it was finally time to make a decision and get this one done. I went through all my jars and vases and settled on this nice square clear vase that is narrower on the bottom than the top. At first I thought I would decorate it with Sharpie markers, but I seriously disliked anything I tried. Then I had the most artistic member of my family give it a try, but for some reason my 16 year old son didn't have the same enthusiasm for this as I did and his attempt was no better than mine.
 Then I had a bit of a brainstorm. I have some leftover ink jet sticker paper from some project from a decade or so ago, and I'm pretty good with Photoshop Elements. So I created this. I then printed it mirror imaged (free transform tool, set at width -100%) onto the sticker paper. I did mirror image so that I could place the sticker on the inside of the jar, because previous experience showed me that this sticker paper peels up way too easily and I figured having it on the inside would limit that.
But even then the sticker didn't work as well as I had in mind. First, I forgot how not clear the sticker paper is. It's more vellum looking than clear. Still, I could be okay with that, but the paper also bubbled and folded terribly. Sigh.
At that point I rethought starting all over and going in a total different direction. But then the ridiculousness of this whole adventure hit me. Notice the original pin. It's just a quart mason jar with a lid. The purpose of this concept was just slips of paper with what you are thankful for stored in a jar. How crazy is it that how pretty the jar looked was mattering to me more than what I wanted to put in it. Sigh.
Anyway, here's the jar on my school bookshelf. I don't know why the handless Lego guy was on the shelf, but I had to move him to put the jar there so I just stood him up toward the front. Like my cool pencil can?

This week I finally got around to something that has been on my heart since last fall or before. My family has been suffering from a lack of gratitude for a long time now and I've been wanting to do something about it. So when I ran across this pin for the idea of a gratitude jar (right), I knew it was what I wanted. This is what I came up with. I had all kinds of ideas for a gratitude jar. I was going to put a nice quilted strip around the middle of a mason jar, but I'm really not that good at quilting and I could never decide what colors I wanted anyway. Then I was going to get some glass etching paste and etch "Gratitude" down the side of my button jar, but then I would have to find a new button jar. Anyway, the upshot was that months went by and I never got around to doing anything.
Then, with all the pins I've been making lately, I decided it was finally time to make a decision and get this one done. I went through all my jars and vases and settled on this nice square clear vase that is narrower on the bottom than the top. At first I thought I would decorate it with Sharpie markers, but I seriously disliked anything I tried. Then I had the most artistic member of my family give it a try, but for some reason my 16 year old son didn't have the same enthusiasm for this as I did and his attempt was no better than mine.
 Then I had a bit of a brainstorm. I have some leftover ink jet sticker paper from some project from a decade or so ago, and I'm pretty good with Photoshop Elements. So I created this. I then printed it mirror imaged (free transform tool, set at width -100%) onto the sticker paper. I did mirror image so that I could place the sticker on the inside of the jar, because previous experience showed me that this sticker paper peels up way too easily and I figured having it on the inside would limit that.
But even then the sticker didn't work as well as I had in mind. First, I forgot how not clear the sticker paper is. It's more vellum looking than clear. Still, I could be okay with that, but the paper also bubbled and folded terribly. Sigh.
At that point I rethought starting all over and going in a total different direction. But then the ridiculousness of this whole adventure hit me. Notice the original pin. It's just a quart mason jar with a lid. The purpose of this concept was just slips of paper with what you are thankful for stored in a jar. How crazy is it that how pretty the jar looked was mattering to me more than what I wanted to put in it. Sigh.
Anyway, here's the jar on my school bookshelf. I don't know why the handless Lego guy was on the shelf, but I had to move him to put the jar there so I just stood him up toward the front. Like my cool pencil can?

Thursday, July 18, 2013
Little Things: Binder Placeholder Thingies
This is another "Little Things" post to show people a handy binder tool I use for school but I don't know what they are called or even if they can be bought.
Quite a few years ago I was working the Sonlight booth at the Arizona Families for Home Education convention in Phoenix with a former Sonlight consultant, Colleen. She had these plastic things that pop easily in and out of binders and stick out the top to mark your place, but they had the wrong contact information on them so she couldn't give them away to just anyone coming into the booth. So, she let me take as many of them as I want. I took 6 or 7, and honestly I have wished more than once over the years that I had taken more. They are soooo handy for marking your place in a binder. Last year I even took one of the binder labels for the Cores we were using and marked the top of the tabby thing so that I even more quickly flip to Core C or Core 100 in my working binder (I keep about 4 weeks worth of each IG, along with a few other things, in my 1" binder).


You'll see on the right photo that I have Post-It Notes on the backside of the tabby thing and that the Post-Its have been printed on. This page has templates for printing on a couple of different sized Post-Its, and it works quite well. I prefer to print any notes I will be using over a longer period than just once or twice.
Tuesday, July 16, 2013
Making stuff from Pinterest: 2nd week of July
I did make a couple things from Pinterest last week; I just haven't gotten around to posting about them.
First I tried upcycling milk jugs into storage containers from this pin that I pinned over a year ago. The blog links to Spoonful's instructions (formally Family Fun), but I found those to be a bit vague so I googled better instructions and found a nice mommy blog that I totally can't find now. Sorry.


The left is the blog's photo. The right is my attempt. Honestly, mine looks quite a bit like the tutorial's, but up close in real life it's just not as an impressive idea as it looks on my laptop screen. I ended up throwing the three I made into the recycle bin and tossed the other milk jugs I had been saving into there as well.
This isn't really a Pinstrosity, as it turned out just like the tutorial showed, but it's not a Pin Win either as I didn't want to use them after I made them. So, yet another Pin Meh for me. Sigh.
 The second pin I did was only on my Pin Board for a couple weeks, but when my youngest daughter pulled out the color bucket, a handled bin that we throw all our loose crayons, markers, and colored pencils into, I just started the project on the spur of the moment. All those broken crayons in the bucket just screamed at me to turn the kids loose making crayon candles.
I made two changes from the blog's instructions. The first was using a birthday candle for the wick (I got that idea from the comments of the blog). I found it best to wait until after the crayons were all melted (only a couple of hours in our 108°F heat this time of year) and then gently push the birthday candle into the center. The other change is that I cut up some Scentsy scents to mix in with the broken crayons to give the candles a nice smell. I've broken two Scentsy warmers now but still have a few of the scents left. At least this way they get some use.
The results were great. Definitely a Pin Win for this one. I love the mix of colors, especially my 10 year old's who chose to use only oranges and yellows. My 6 year old's, the red/blue/pink/green one, smells like dessert, however, as she chose Scentsy Peach scent and used a lot of it.

First I tried upcycling milk jugs into storage containers from this pin that I pinned over a year ago. The blog links to Spoonful's instructions (formally Family Fun), but I found those to be a bit vague so I googled better instructions and found a nice mommy blog that I totally can't find now. Sorry.

The left is the blog's photo. The right is my attempt. Honestly, mine looks quite a bit like the tutorial's, but up close in real life it's just not as an impressive idea as it looks on my laptop screen. I ended up throwing the three I made into the recycle bin and tossed the other milk jugs I had been saving into there as well.
This isn't really a Pinstrosity, as it turned out just like the tutorial showed, but it's not a Pin Win either as I didn't want to use them after I made them. So, yet another Pin Meh for me. Sigh.
The second pin I did was only on my Pin Board for a couple weeks, but when my youngest daughter pulled out the color bucket, a handled bin that we throw all our loose crayons, markers, and colored pencils into, I just started the project on the spur of the moment. All those broken crayons in the bucket just screamed at me to turn the kids loose making crayon candles. I made two changes from the blog's instructions. The first was using a birthday candle for the wick (I got that idea from the comments of the blog). I found it best to wait until after the crayons were all melted (only a couple of hours in our 108°F heat this time of year) and then gently push the birthday candle into the center. The other change is that I cut up some Scentsy scents to mix in with the broken crayons to give the candles a nice smell. I've broken two Scentsy warmers now but still have a few of the scents left. At least this way they get some use.
The results were great. Definitely a Pin Win for this one. I love the mix of colors, especially my 10 year old's who chose to use only oranges and yellows. My 6 year old's, the red/blue/pink/green one, smells like dessert, however, as she chose Scentsy Peach scent and used a lot of it.

Saturday, July 6, 2013
Doing, Not just Pinning: 1st Week of July
Last week I posted about my goal to make something I have pinned each week of this summer. Last week it was a set of washable Swiffer clothes. Well, I'm happy to say I'm two for two in getting something done, although this week was a close one.
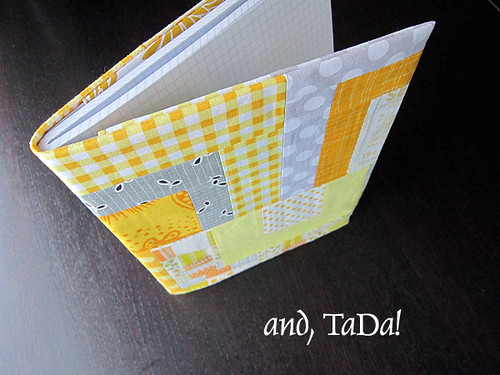
I pinned this tutorial for making a composition book cover some 9 months ago or so. I even bought some nice red fat quarters and muslin to make it with around that time too. This week I finally got around to doing it.
I didn't follow the tutorial exactly, mostly because I seem completely unable to follow any instructions exactly, but also because I wanted to do some quilting on mine so I needed to add some thin batting and a backing. So my finished cover isn't as thin, but I love it none the less.
I use a composition book for church, writing in prayer requests that people make plus some sermon notes and scripture references. I struggle to remember what I hear, and there are times that if I don't write a scripture reference down I won't remember it long enough to actually turn to it. Yeah, you read that right. I can forget what I heard in less time than it takes me to flip to the right book of the Bible. Hey, we all have our weaknesses.
 Since this was a cover for something I use at church, I wanted a cross on the front cover. I googled "cross quilt pattern" and while I found a few things, this one caught my eye. I love the wonky, not perfectness of the crosses, because "wonky, not prefect" is probably an adequate description of myself. Carla's tutorial takes all the guess work out of the block too.
Here are some more shots of my cover. I wanted the larger cross on the front, but more quilty look for the back. Stay tuned for next week's project.


I pinned this tutorial for making a composition book cover some 9 months ago or so. I even bought some nice red fat quarters and muslin to make it with around that time too. This week I finally got around to doing it.
 |
Journal Covers Tutorial |
 |
My Cover |
I didn't follow the tutorial exactly, mostly because I seem completely unable to follow any instructions exactly, but also because I wanted to do some quilting on mine so I needed to add some thin batting and a backing. So my finished cover isn't as thin, but I love it none the less.
I use a composition book for church, writing in prayer requests that people make plus some sermon notes and scripture references. I struggle to remember what I hear, and there are times that if I don't write a scripture reference down I won't remember it long enough to actually turn to it. Yeah, you read that right. I can forget what I heard in less time than it takes me to flip to the right book of the Bible. Hey, we all have our weaknesses.
Since this was a cover for something I use at church, I wanted a cross on the front cover. I googled "cross quilt pattern" and while I found a few things, this one caught my eye. I love the wonky, not perfectness of the crosses, because "wonky, not prefect" is probably an adequate description of myself. Carla's tutorial takes all the guess work out of the block too.Here are some more shots of my cover. I wanted the larger cross on the front, but more quilty look for the back. Stay tuned for next week's project.


Monday, July 1, 2013
Workboxes Evolution
I first attempted a form of workboxes way back in the spring of 2009 and it was a quick crash and burn. It was a single bin with file folders and it kept falling over and didn't motivate my then K'er at all.
I attempted it differently, and more fully, in the summer of the following year, and I am glad to say that while parts of the system I detailed in that post have gone by the wayside (like the whole workfolder system), the heart of that system is still in use now 3 years later.
In this post a year later, summer of 2011, I detailed the slight changes that happened to our system over the first year of use.
Today I'll give you the run down of how our workboxes have functioned day in and day out for most days over the last two years.
First, I am no longer doing workboxes, workfolders, or any thing of that sort with my teens. I simply email them a pdf schedule with 5 days worth of assignments in every subject and they work off of that. They do use a large bin (like the ones pictured below, but deeper) with file folders in it to store finished work. Books they are using either go on the school book shelf or on their own book shelf in their room (or, more honestly, on the floor next to their beds). My elementary students, 5th, 3rd, and 1st grades as of today, are the ones still using workboxes.
 Here is what our school bins (as we refer to them at home) look like. They are 6.2 quart flat stacking bins with locking lids measuring 15" long by 11" wide by 3.25" high or, more simply put, big enough so that even the largest workbook lies flat. Sadly it seems the only ones available currently are no longer colorless but are all over aqua. Ugh. Sterilite now has a slightly different clip box that would serve the same purpose that you can get at Target for the same price as the visually shocking agua ones. Google "workboxes" to see the million different types of containers other people use.

Since my husband put in built-in cabinets and shelves for me last summer, our school bins have lived in a cupboard, out of sight when we aren't actively doing school. I used colored duct tape to "label" both handles of each bin with the student's color so everyone can tell at a glance whose bin is whose.
At the beginning of a school day, the bins are removed from the cupboard and moved across the room or under the table or wherever the kid wants their stack to be for the day, except not in major walkways or strewn over 10 linear feet of floor space (because sometimes I just have to be a mean mommy, sigh). Then they work through their school a bin at a time, putting each bin back in the cupboard as that subject is completed. They are free to choose the order of their bins for the most part, although I occasionally intervene and require them to do a troubling subject earlier in the day. When all the bins are back in the cupboard they are done with school. We tried, briefly, to do the whole take-a-number-off-and-put-it-on-a-grid thing but it seemed purposeless when moving the entire bin from the stack to the cupboard was a much more climatic visual of finished work.
I do not put "fun" things in our workboxes. I tried it at the very beginning of our workboxes adventures, but it was a pain for both me and the kids. I keep an almost obscene amount of art and craft supplies, educational toys, games, DVDs, science projects, lapbooking stuff, historical projects, nature study objects, and more on hand and I freely encourage the kids to use them as they want (with permission, mostly so they aren't pulling stuff out before putting other stuff away). With all that fun stuff of their choosing, what was fun about something mom chose? Day after day there were asking, "Do I have to do this?" Um, no that painting project I spent 10 minutes putting together yesterday afternoon so that you would have something "fun" in your workboxes isn't really "school", and if you aren't going to have fun doing it why bother. Yeah, I gave up on choosing fun things for them pretty quick and just went back to encouraging them to pick whatever fun stuff they wanted. That works better for all of us.
I will add that I did fill a couple bins with fun but quiet and independent activities for my preschooler, when I still had a preschooler. It gave her something to do and kept her busy and (mostly) quiet for a while as I did school with her brothers. I did things like ready-made tea parties, games like Mighty Mind and Activities in a Bag, play dough (homemade, of course), sand letter cards, Tot Tray ideas, and many other things. Surprisingly, I didn't have to switch out the things in her bins daily in order to keep her entertained. Even though she had the shortest attention span of any of my kids (and still does, but that's a whole other blog post, sigh), she still would play with the same couple bins for up to a week before growing bored of them.
For a while I put shared subjects, like Sonlight Read Alouds and Science, in one child's bin and when he got to it he knew we had to all do it together. However, for the last year or more I have had kept shared subjects on the school shelf and we just know that we have to do them as well. Since we do the shared subjects all at once, either first thing when we start school (9:00 ish) or first thing after lunch, it's just easier for them not to be in the bins.
I do not set up our workboxes every day. I just don't. Many subjects, like Math and Handwriting, are workbook based and we simply do the next thing each day. Post-It Note Flags, in each child's color of course, are ideal for keeping our place in each workbook. It would be more work, more mess, and more likely to cause lost papers if I cut the workbooks apart to put in just one day's work. Of course, some subjects are done on loose papers, like Sonlight's Language Arts Activity Sheets and copywork work assignments, but I put blank lined paper and Activity Sheets in that bin for up to a month at a time. I rarely need to mess with more than one or two workbox contents each week, let alone messing with every workbox for every child every day. A system that required that just wouldn't last two days in my house.
I see our workbox system continuing pretty much as-is for years yet. They provide a visual list of what needs to be done each day so that both the student and I can see at a glance what is left. They also provide school storage and organization along with portability. Workboxes are a huge and very successful part of our homeschool.
I attempted it differently, and more fully, in the summer of the following year, and I am glad to say that while parts of the system I detailed in that post have gone by the wayside (like the whole workfolder system), the heart of that system is still in use now 3 years later.
In this post a year later, summer of 2011, I detailed the slight changes that happened to our system over the first year of use.
Today I'll give you the run down of how our workboxes have functioned day in and day out for most days over the last two years.
First, I am no longer doing workboxes, workfolders, or any thing of that sort with my teens. I simply email them a pdf schedule with 5 days worth of assignments in every subject and they work off of that. They do use a large bin (like the ones pictured below, but deeper) with file folders in it to store finished work. Books they are using either go on the school book shelf or on their own book shelf in their room (or, more honestly, on the floor next to their beds). My elementary students, 5th, 3rd, and 1st grades as of today, are the ones still using workboxes.

Since my husband put in built-in cabinets and shelves for me last summer, our school bins have lived in a cupboard, out of sight when we aren't actively doing school. I used colored duct tape to "label" both handles of each bin with the student's color so everyone can tell at a glance whose bin is whose.
At the beginning of a school day, the bins are removed from the cupboard and moved across the room or under the table or wherever the kid wants their stack to be for the day, except not in major walkways or strewn over 10 linear feet of floor space (because sometimes I just have to be a mean mommy, sigh). Then they work through their school a bin at a time, putting each bin back in the cupboard as that subject is completed. They are free to choose the order of their bins for the most part, although I occasionally intervene and require them to do a troubling subject earlier in the day. When all the bins are back in the cupboard they are done with school. We tried, briefly, to do the whole take-a-number-off-and-put-it-on-a-grid thing but it seemed purposeless when moving the entire bin from the stack to the cupboard was a much more climatic visual of finished work.
I do not put "fun" things in our workboxes. I tried it at the very beginning of our workboxes adventures, but it was a pain for both me and the kids. I keep an almost obscene amount of art and craft supplies, educational toys, games, DVDs, science projects, lapbooking stuff, historical projects, nature study objects, and more on hand and I freely encourage the kids to use them as they want (with permission, mostly so they aren't pulling stuff out before putting other stuff away). With all that fun stuff of their choosing, what was fun about something mom chose? Day after day there were asking, "Do I have to do this?" Um, no that painting project I spent 10 minutes putting together yesterday afternoon so that you would have something "fun" in your workboxes isn't really "school", and if you aren't going to have fun doing it why bother. Yeah, I gave up on choosing fun things for them pretty quick and just went back to encouraging them to pick whatever fun stuff they wanted. That works better for all of us.
I will add that I did fill a couple bins with fun but quiet and independent activities for my preschooler, when I still had a preschooler. It gave her something to do and kept her busy and (mostly) quiet for a while as I did school with her brothers. I did things like ready-made tea parties, games like Mighty Mind and Activities in a Bag, play dough (homemade, of course), sand letter cards, Tot Tray ideas, and many other things. Surprisingly, I didn't have to switch out the things in her bins daily in order to keep her entertained. Even though she had the shortest attention span of any of my kids (and still does, but that's a whole other blog post, sigh), she still would play with the same couple bins for up to a week before growing bored of them.
For a while I put shared subjects, like Sonlight Read Alouds and Science, in one child's bin and when he got to it he knew we had to all do it together. However, for the last year or more I have had kept shared subjects on the school shelf and we just know that we have to do them as well. Since we do the shared subjects all at once, either first thing when we start school (9:00 ish) or first thing after lunch, it's just easier for them not to be in the bins.
I do not set up our workboxes every day. I just don't. Many subjects, like Math and Handwriting, are workbook based and we simply do the next thing each day. Post-It Note Flags, in each child's color of course, are ideal for keeping our place in each workbook. It would be more work, more mess, and more likely to cause lost papers if I cut the workbooks apart to put in just one day's work. Of course, some subjects are done on loose papers, like Sonlight's Language Arts Activity Sheets and copywork work assignments, but I put blank lined paper and Activity Sheets in that bin for up to a month at a time. I rarely need to mess with more than one or two workbox contents each week, let alone messing with every workbox for every child every day. A system that required that just wouldn't last two days in my house.
I see our workbox system continuing pretty much as-is for years yet. They provide a visual list of what needs to be done each day so that both the student and I can see at a glance what is left. They also provide school storage and organization along with portability. Workboxes are a huge and very successful part of our homeschool.
Subscribe to:
Posts (Atom)