Showing posts with label Doing. Show all posts

Friday, July 19, 2013

4 for 4: Doing, Not Pinning

My summer goal to actually make a pin a week is going great, much better than I anticipated. Because, let's be honest here, I'm kind of flaky and have the attention span of a gnat. Four weeks in a row I have done at least one thing from my pin board. Last week I even did two things!

This week I finally got around to something that has been on my heart since last fall or before. My family has been suffering from a lack of gratitude for a long time now and I've been wanting to do something about it. So when I ran across this pin for the idea of a gratitude jar (right), I knew it was what I wanted.


This is what I came up with. I had all kinds of ideas for a gratitude jar. I was going to put a nice quilted strip around the middle of a mason jar, but I'm really not that good at quilting and I could never decide what colors I wanted anyway. Then I was going to get some glass etching paste and etch "Gratitude" down the side of my button jar, but then I would have to find a new button jar. Anyway, the upshot was that months went by and I never got around to doing anything.

Then, with all the pins I've been making lately, I decided it was finally time to make a decision and get this one done. I went through all my jars and vases and settled on this nice square clear vase that is narrower on the bottom than the top. At first I thought I would decorate it with Sharpie markers, but I seriously disliked anything I tried. Then I had the most artistic member of my family give it a try, but for some reason my 16 year old son didn't have the same enthusiasm for this as I did and his attempt was no better than mine.

Then I had a bit of a brainstorm. I have some leftover ink jet sticker paper from some project from a decade or so ago, and I'm pretty good with Photoshop Elements. So I created this. I then printed it mirror imaged (free transform tool, set at width -100%) onto the sticker paper. I did mirror image so that I could place the sticker on the inside of the jar, because previous experience showed me that this sticker paper peels up way too easily and I figured having it on the inside would limit that.

But even then the sticker didn't work as well as I had in mind. First, I forgot how not clear the sticker paper is. It's more vellum looking than clear. Still, I could be okay with that, but the paper also bubbled and folded terribly. Sigh.

At that point I rethought starting all over and going in a total different direction. But then the ridiculousness of this whole adventure hit me. Notice the original pin. It's just a quart mason jar with a lid. The purpose of this concept was just slips of paper with what you are thankful for stored in a jar. How crazy is it that how pretty the jar looked was mattering to me more than what I wanted to put in it. Sigh.

Anyway, here's the jar on my school bookshelf. I don't know why the handless Lego guy was on the shelf, but I had to move him to put the jar there so I just stood him up toward the front. Like my cool pencil can?


Tuesday, July 16, 2013

Making stuff from Pinterest: 2nd week of July

I did make a couple things from Pinterest last week; I just haven't gotten around to posting about them.

First I tried upcycling milk jugs into storage containers from this pin that I pinned over a year ago. The blog links to Spoonful's instructions (formally Family Fun), but I found those to be a bit vague so I googled better instructions and found a nice mommy blog that I totally can't find now. Sorry.

The left is the blog's photo. The right is my attempt. Honestly, mine looks quite a bit like the tutorial's, but up close in real life it's just not as an impressive idea as it looks on my laptop screen. I ended up throwing the three I made into the recycle bin and tossed the other milk jugs I had been saving into there as well.

This isn't really a Pinstrosity, as it turned out just like the tutorial showed, but it's not a Pin Win either as I didn't want to use them after I made them. So, yet another Pin Meh for me. Sigh.


The second pin I did was only on my Pin Board for a couple weeks, but when my youngest daughter pulled out the color bucket, a handled bin that we throw all our loose crayons, markers, and colored pencils into, I just started the project on the spur of the moment. All those broken crayons in the bucket just screamed at me to turn the kids loose making crayon candles.

I made two changes from the blog's instructions. The first was using a birthday candle for the wick (I got that idea from the comments of the blog). I found it best to wait until after the crayons were all melted (only a couple of hours in our 108°F heat this time of year) and then gently push the birthday candle into the center. The other change is that I cut up some Scentsy scents to mix in with the broken crayons to give the candles a nice smell. I've broken two Scentsy warmers now but still have a few of the scents left. At least this way they get some use. 

The results were great. Definitely a Pin Win for this one. I love the mix of colors, especially my 10 year old's who chose to use only oranges and yellows. My 6 year old's, the red/blue/pink/green one, smells like dessert, however, as she chose Scentsy Peach scent and used a lot of it.


Saturday, July 6, 2013

Doing, Not just Pinning: 1st Week of July

Last week I posted about my goal to make something I have pinned each week of this summer. Last week it was a set of washable Swiffer clothes. Well, I'm happy to say I'm two for two in getting something done, although this week was a close one.

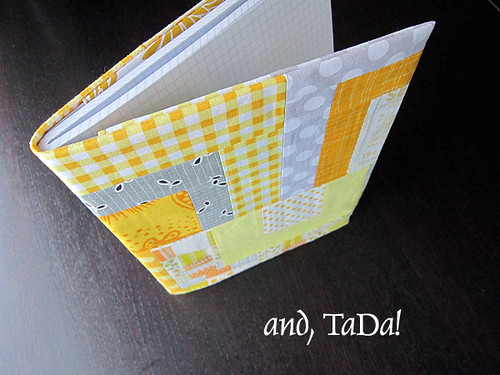
I pinned this tutorial for making a composition book cover some 9 months ago or so. I even bought some nice red fat quarters and muslin to make it with around that time too. This week I finally got around to doing it. 

Journal Covers Tutorial

My Cover


I didn't follow the tutorial exactly, mostly because I seem completely unable to follow any instructions exactly, but also because I wanted to do some quilting on mine so I needed to add some thin batting and a backing. So my finished cover isn't as thin, but I love it none the less.

I use a composition book for church, writing in prayer requests that people make plus some sermon notes and scripture references. I struggle to remember what I hear, and there are times that if I don't write a scripture reference down I won't remember it long enough to actually turn to it. Yeah, you read that right. I can forget what I heard in less time than it takes me to flip to the right book of the Bible. Hey, we all have our weaknesses.

Since this was a cover for something I use at church, I wanted a cross on the front cover. I googled "cross quilt pattern" and while I found a few things, this one caught my eye. I love the wonky, not perfectness of the crosses, because "wonky, not prefect" is probably an adequate description of myself. Carla's tutorial takes all the guess work out of the block too.

Here are some more shots of my cover. I wanted the larger cross on the front, but more quilty look for the back. Stay tuned for next week's project.


Wednesday, June 26, 2013

Doing, Not Just Pinning: Last Week of June

June was a bear of busyness for me. I worked the Sonlight booth at two conventions on back-to-back weeks this year, Anaheim and Phoenix, and then the day after I get back our church's Vacation Bible School started. This week was my first chance to get stuff done around the house in almost a month, but it's also the first week my husband started a new old job (rehired for a job he worked at over a year ago). Busy, I tell you.

Anyway, in addition to summer cleaning (see foot note) and organizing for our new homeschool year that starts in July, I've decided that I've done way too much pinning to Pinterest lately and not nearly enough doing of what I have pinned. I've set myself a goal to do something I've pinned each week from now through the end of August, as life gets busy again for me come September when Home Educators of Yuma, the local support group that I am vice president of, starts up again.

For this first week of my self-imposed challenge, a week still full of chores relating to me being away from home for more days than all the rest of the year combined, I chose an easy pin that I knew I could whip out in just a bit of time. I pinned this tutorial for Reusable Swiffer Duster Cloths well over a year ago, and today I finally made some. I made just one little change to the tutorial in order to work with my needs and I am pleased as punch with the result. This is definitely a Pin Win.


I used a green fabric marker to color the opening where the wand slides in. All those layers made it a bit confusing where to put the wand, and my kids love to Swiffer (something about the wand, I think) so this removes the confusion for them. Green for "Go here."

As you can see below, we've already used one. It isn't as fluffy as the finished photo on the tutorial, but that's because I haven't washed them yet. My flannel was already prewashed, so I felt no need to wash my dusters before using them. Obviously they work great.

I made four of them, because we don't dust a bit at a time but rather dust lots at one time and then not again for a good while. I wanted to be sure to have enough to do a boat load of dusting all at once (like the two or three times a year we dust all seven ceiling fans in one day).

Now I don't have to say, "No," when my six year old asks to dust just because I don't want to waste the throw-away Swiffers. I have this thing about starting high and working down when it comes to dusting, and my six year old can't reach what I consider high even with a step stool. Now I can say, "Yes, go for it," and let her dust to her short little heart's content, and can just do all the low stuff again whenever I get around to doing the high.

Foot note: We don't do spring cleaning down here in the desert, because we keep our windows and doors open all winter and spring. It just doesn't make sense to do deep cleaning and hard to reach dusting and vacuuming when at any moment a dust storm will blow in and ruin all that work. Rather, we do summer cleaning and fall cleaning. Summer cleaning when we finally shut up the house for good once we have to run the A/C around the clock, and fall cleaning when we opening the house back up again. Mind you, I'm talking about deep cleaning here. We do regular cleaning a bit more than twice a year, I promise.

Thursday, February 7, 2013

Pin Meh

I was inspired by the Pinstrosity blog's upcoming Pinstrosiversary Challenge to get my act in gear and make something I pinned months and months ago. I had actually bought all the materials last summer, but never got around to it, so lack of budget right now was no excuse for this one.


My result? Well, it turned out just meh, just okay. It's definitely not a Pin Win, but it's not quite a Pinstrosity either. So I created a new catagory. Pin Meh.

I pinned this idea to create a custom t-shirt using freezer paper as a stencil a long, long time ago. Didn't hers turn out so well?

She actually drew her design freehanded, which is pretty far beyond my limited abilities, so I turned to my old faithful Photoshop Elements and created these two designs. (As always, click on a photo to see a full sized image.)
 
The one on the left is for my 6 year old daughter. She calls her daddy "Daddy-Boy", which he completely encourages because he thinks it's so cute. The one on the right is for my 10 year old son, who for some strange reason collects rusty nails and has been known to tell his uncles that he will do jobs in order to get them.
So I did my Photoshop Elements magic and printed this in plain black and white straight onto the freezer paper, cut to be 8.5x11 inch size. Then out came the Xacto knives and I painstakingly cut out the stencils. I made sure to cut away just the black and save any white that had to be cut out of the black.


Then I ironed the freezer paper stencils onto the t-shirts (after washing and drying the shirts, as per the fabric pain directions). I folded the shirts in half and ironed a crease and also folded a crease into the stencil so that I could easily line up the centers. Then I ironed the freezer paper on with, and then went back and added in all the little pieces. Tweezers were essential for this.

Next came painting. I used Stencil Spray spray on fabric paint, mostly because that was the only fabric paint available at Wal-Mart and I didn't want to go to another store that particular day. I suspect this is where my project went wrong.


The results were less than stellar. The Stencil Spray is a thick paint and didn't work well at all with the small details in my stencils. If I had used much bigger letters with fewer small details, or if I had used a thinner paint and brushed it on, I think my results would have been much better.


My son's isn't half bad and he likes it. But my daughter's was unreadable. The contrast between the red paint and the hot pink t-shirt isn't enough, plus the curly, messy letters I chose weren't near distinct enough. Since the words were the whole purpose for that shirt, I took a sharpie marker and outlined the letters. All I can say is at least it is readable now, although it's not all that pretty. Sigh. Pin Meh.